"More for Me!" - A place for me to track what I cook and what I eat. Be sure to visit my main blog at https://russlowe.blogspot.com
Sunday, October 4, 2020
Rib Eye on the Anova Sous Vide and Seared on a Possible Blacklock Skillet
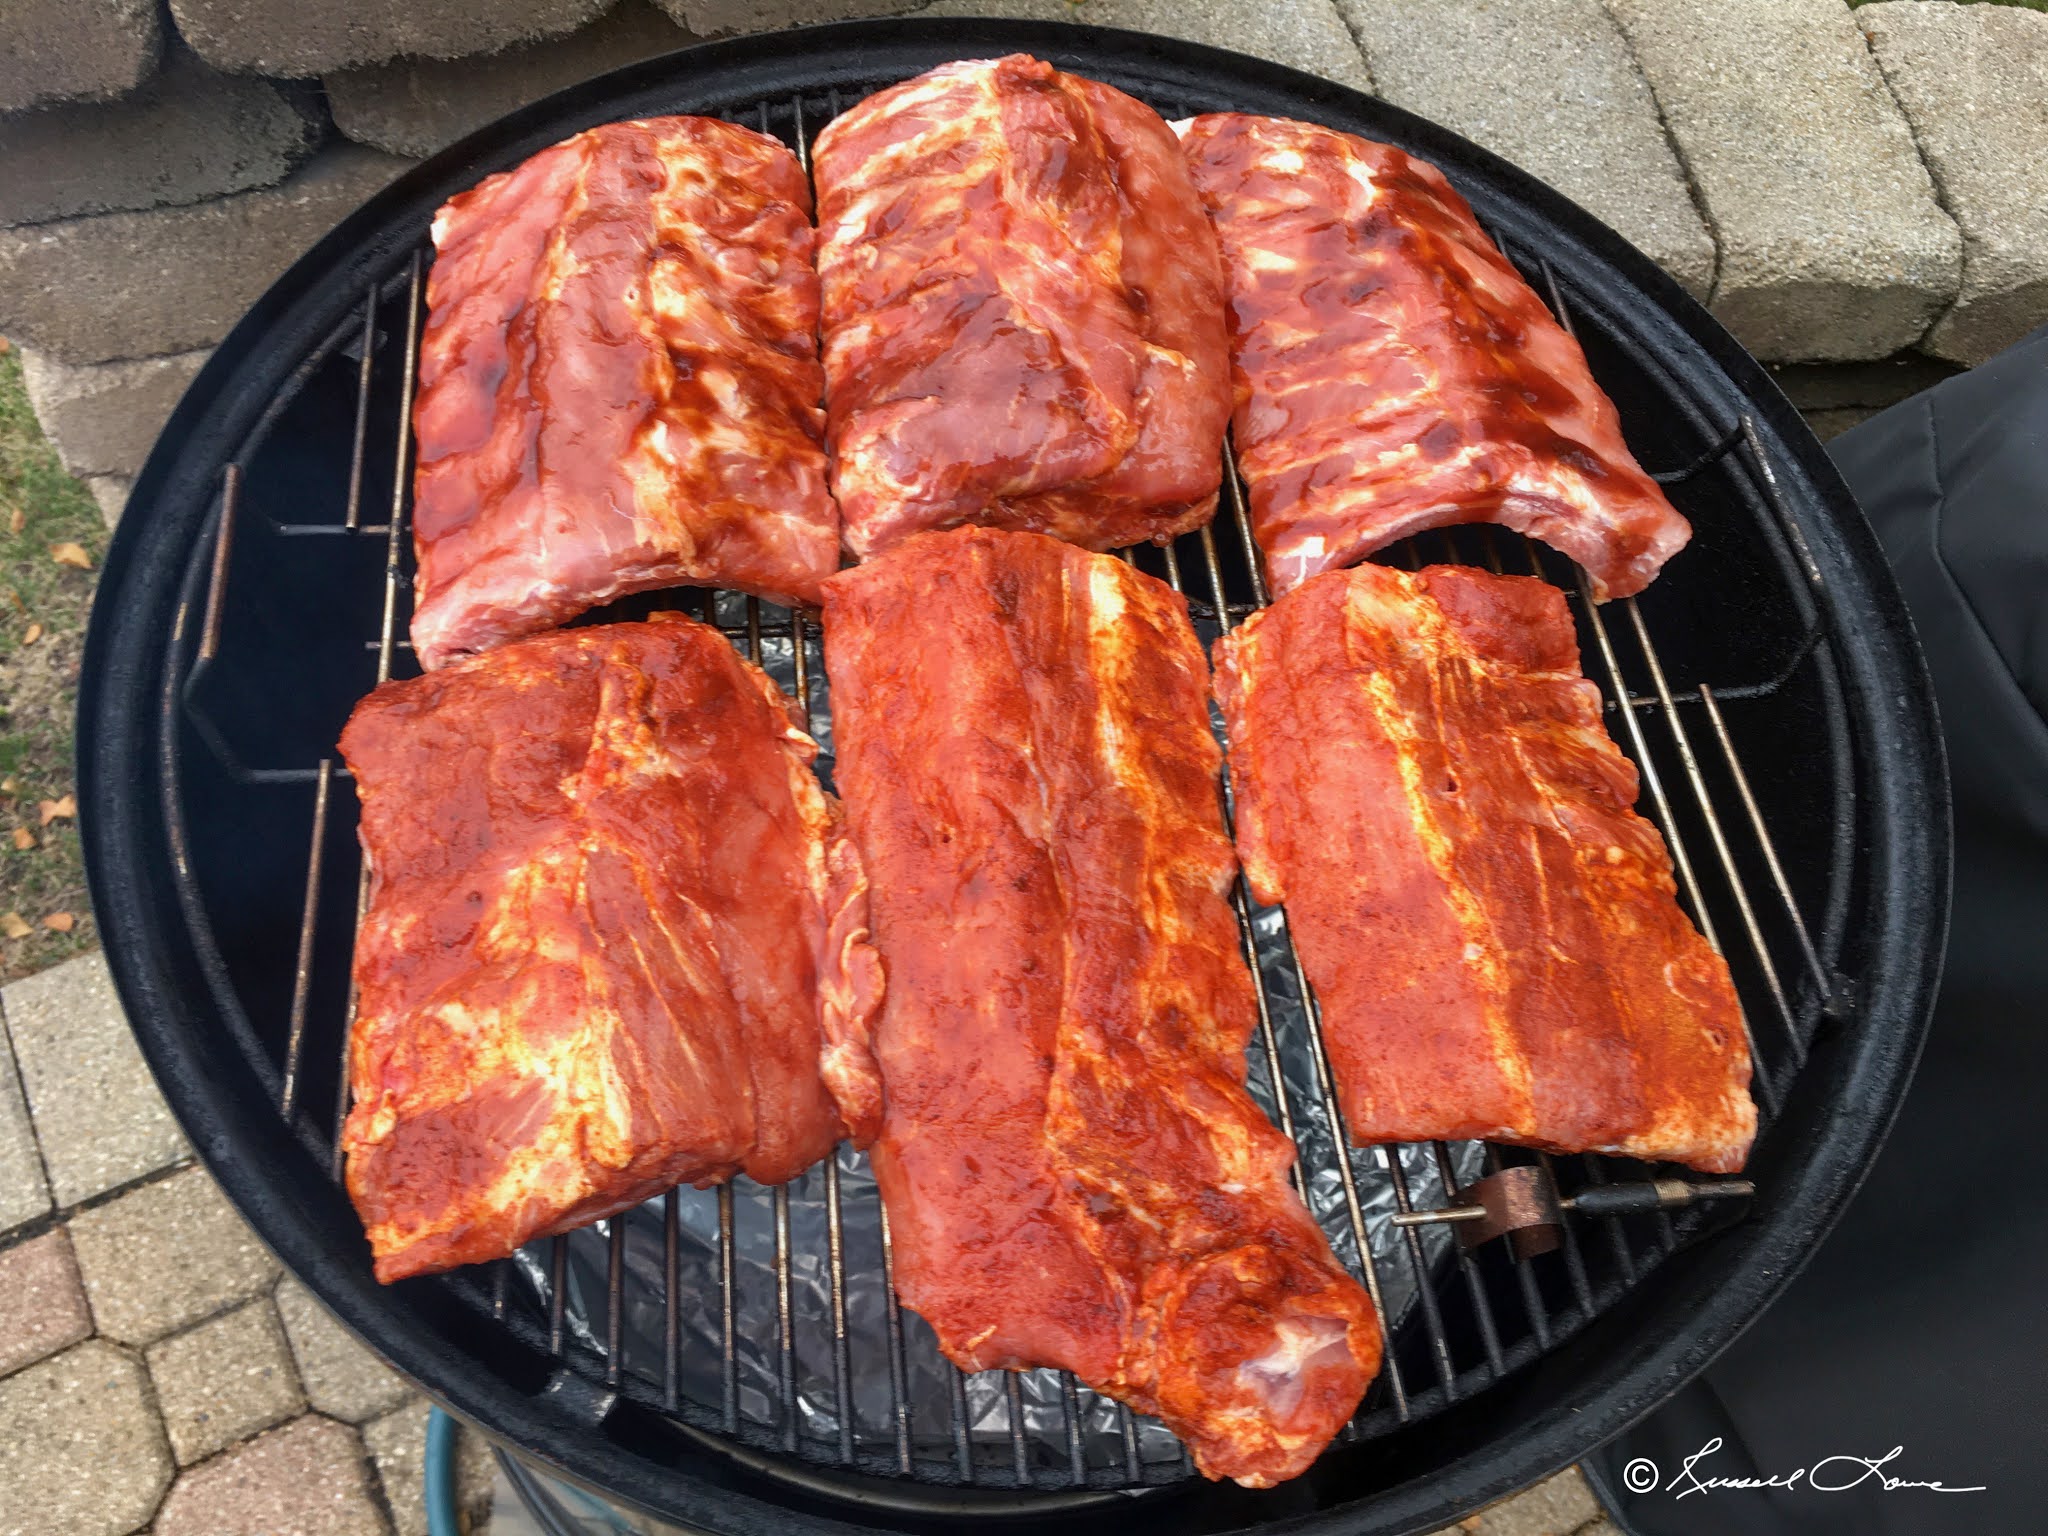
Baby Back Ribs on the 22.5" Weber Smokey Mountain Smoker
Baby Back Ribs from Costco once again!
This time, I cut them and did half of them with Kick Butt Rib Rub - Chipotle Honey rub and the other half with my friend Jim's secret Chinese rib sauce recipe.
My daughter and son-in-law were over at our house and we all thought that my friend Jim's ribs were best... as usual. It has sweet notes to it that is hard to beat, but these ribs also seemed moister and more tender. While both types of ribs were from the same batch from Costco, we figured that because Jim's recipe is actually a sauce that is put on from the very beginning, it kept the ribs more moist throughout the cook.
Rubs tend to make the ribs dryer since I don't put sauce on the ribs until I wrap them. But with Jim's sauce on the ribs from the very start, the ribs are always in a moist state. I put even more after I wrap those too.
The ribs this time was cooked at a pit temp of 265 to 285 degrees on average with the ribs cooked for 2.5 hours unwrapped and then 2.5 hours wrapped with foil and sauce applied. They came out great overall.
Monday, September 14, 2020
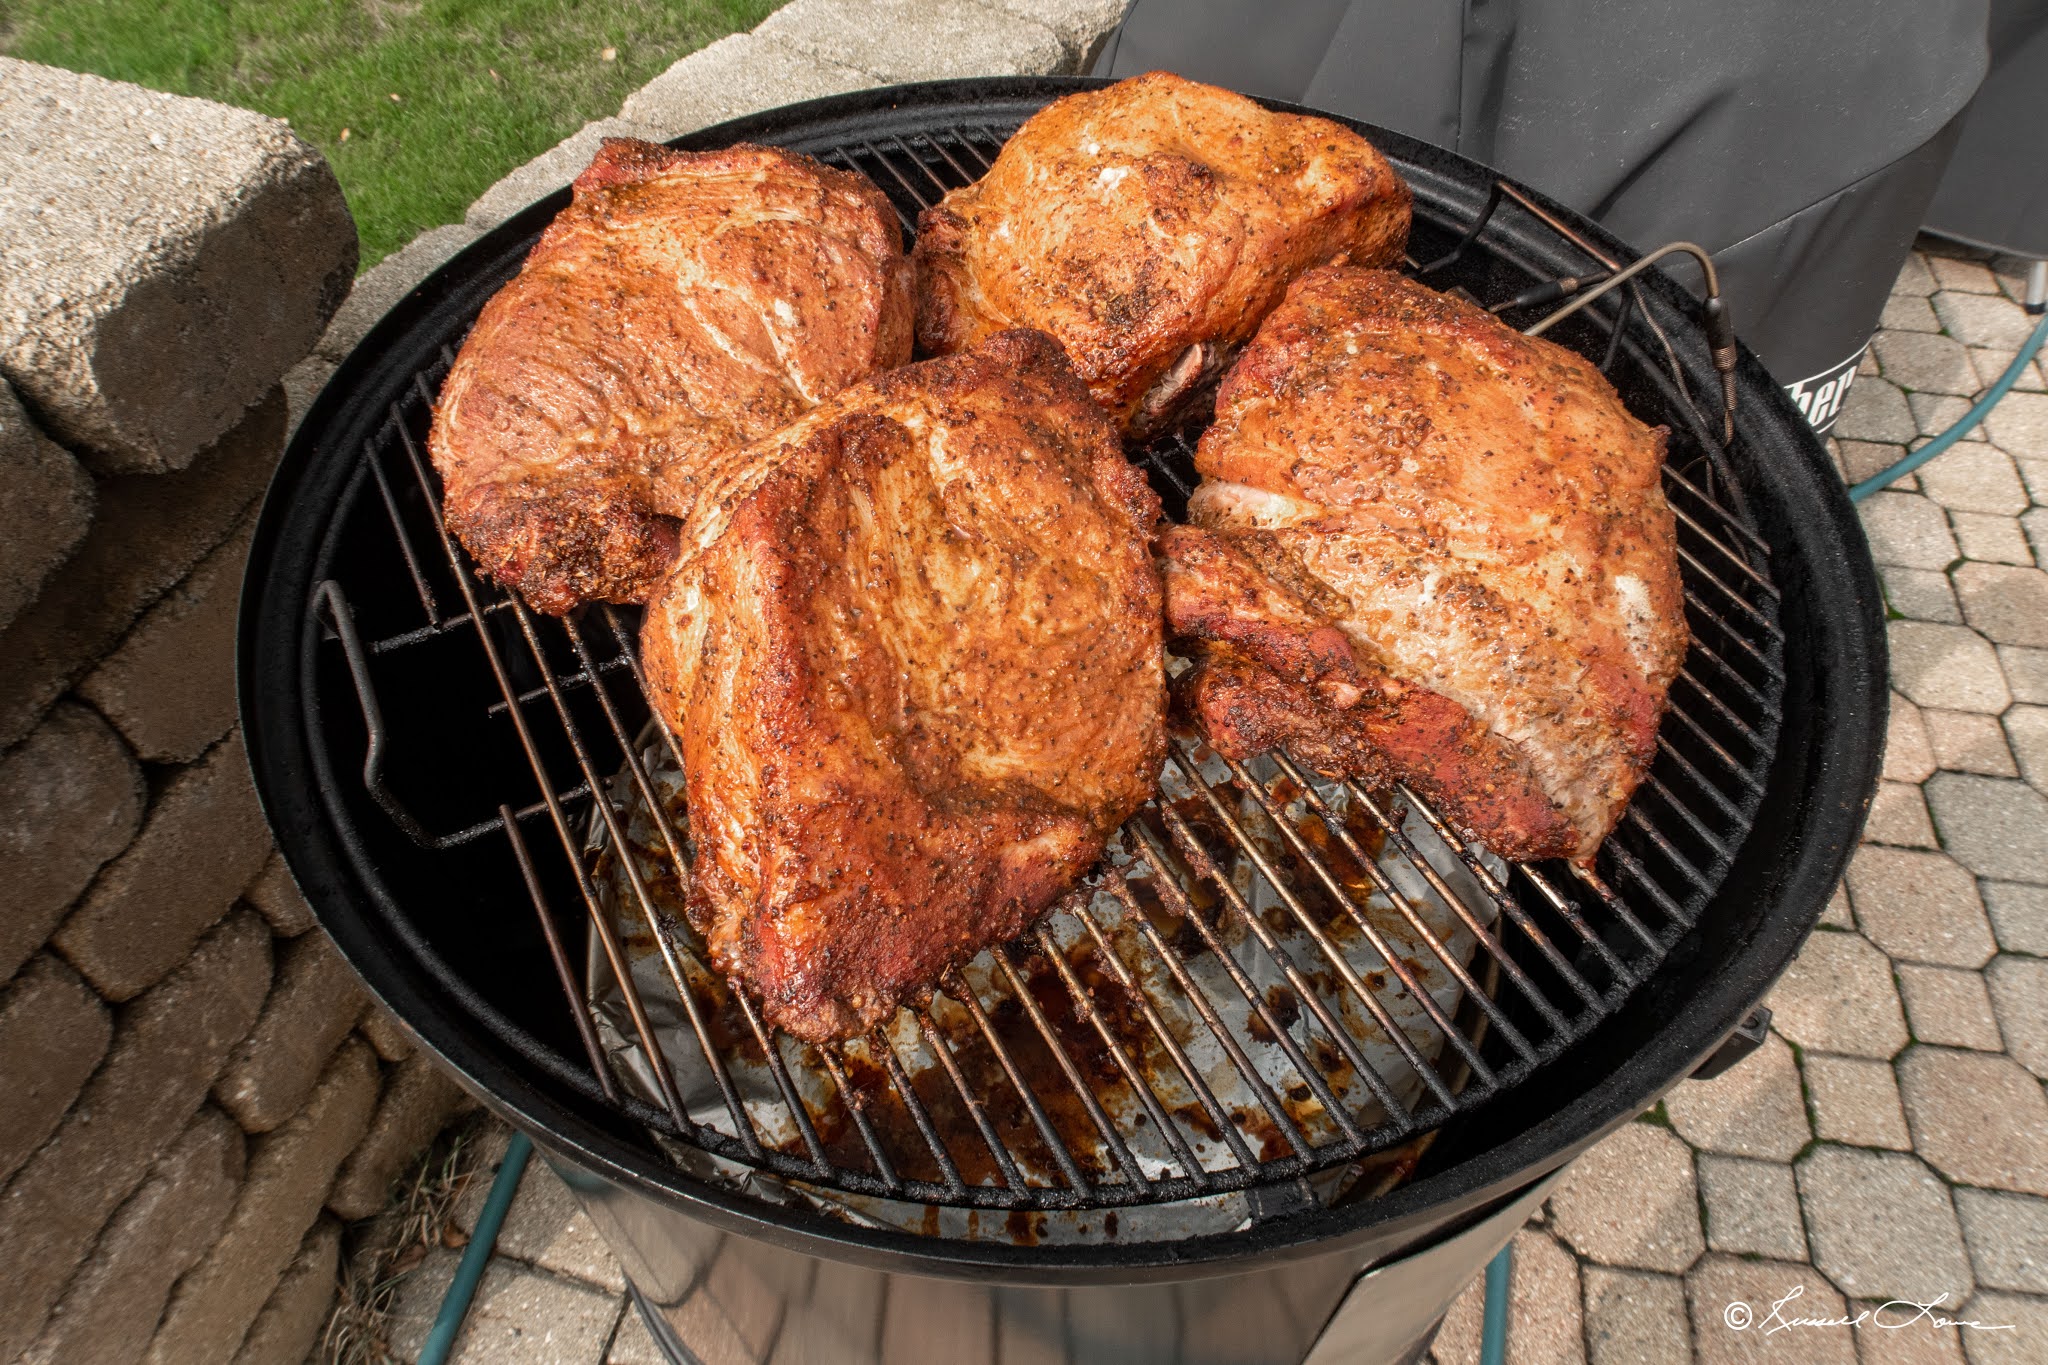
14 Lbs of Pork on the 22.5" WSM

As usual, the 14 lbs of pork were cut in half and Costco's rub applied. The 22.5" WSM held temp to 265 degrees for 6 hours until it ran out of charcoal. That's ok because the meat was done at 197 degrees! Talk about good timing!
Sunday, September 13, 2020
Pot Roast in the Instant Pot Ultra 6 Quart
Monday, July 27, 2020
Two Pork Butts - Total 12 lbs On The 22.5" Weber Smokey Mountain Smoker
As usual, I smoked two pork butts (cut in half to speed up cooking time). These total 12 lbs after cutting off the fat cap. The bone was still in each pork butt.
Time started at 9:30 AM on the 22.5" WSM and finished at 3:15 PM. It pays to cut the butts in half! Speeds up the cooking like crazy. Doing a temperature probe test on each piece, the probe went in like butter. Very tender. These should pull really easily after it has had some time to rest.
Yes... pulled very easily!
Monday, July 20, 2020
35th Wedding Anniversary Lobster Dinner
Today was our 35th Wedding Anniversary!
For dinner, I made four lobster tails with chicken, corn and rice. Stir fried in my wok with green onions and ginger... it was fast and easy to make!
Saturday, July 11, 2020
Making Char Siu In The 22.5" Weber Smokey Mountain (WSM)
This was the first time making Char Siu in the 22.5" Weber Smokey Mountain (WSM) smoker instead of in the oven.
I cooked the meat at 360 degrees in the smoker... a lot hotter than I normally make pulled pork! I make pulled pork normally around the 250 degrees range, but since I wasn't going to pull this pork and needed it whole, fast and hot was best.
After 1 hour 15 minutes in the smoker, the internal temperature of the meat had reached between 145 and 150 degrees. I brought the trays back inside and put them under the broiler to sear the meat a bit.
The meat was cut into strips and put on an aluminum pan. Typically you would hang the meat directly over the coals, but I didn't want to deal with the mess it would probably make. But the dripping of the fat onto the charcoal imparts a different flavor and that most likely would have been best for taste.
Overall, the charcoal smoking only added a slight flavor of smoke to the meat. I blame this on the trays and also the fact that I did not use any wood on the charcoal. Plus, I didn't hang the meat for the dripping of the fat onto the charcoal. Still, the char siu was very good. Again, I used the America's Test Kitchen recipe for making the char siu maranade (done overnight), but I skipped the sesame oil and also did not glaze the meat to minimize the added sugar and calories.
For ease, I think it's still easier making this in the oven than in the smoker. But if I will do it in the smoker again, I'll have to get a hanging rack (don't have one and really don't intend to get one either).
Saturday, July 4, 2020
Pressure Cooker Explosion - Fagor Pressure Cooker
My wife was cooking some red bean soup in our Fagor Pressure Cooker. 15-20 minutes after the cooker came to pressure, it exploded!
Luckily, neither of us were in the kitchen, but we heard this huge explosion. After checking out the damage, we found the pressure cooker had punched a hole in the kitchen wall near the baseboard and put a slight dent in the stainless steel headboard panel of the stove!
Inspecting the pressure cooker, the front assist handle of the pressure cooker had broken, but the pressure cooker was still intact! The locking mechanism was still locked and the lid did not fall off.
So how did this thing explode? I'm still wondering that. If it weren't for the broken front assist handle probably breaking off when the pressure cooker hit the floor or the wall, you would never know that the pressure cooker had exploded!
We won't be using this pressure cooker any longer (although we could just use it as a cooking pot and skip the cover), but it makes me wonder if this could also happen when using our Instant Pot. I think it most likely can.
Yes, pressure cookers are dangerous. We were just lucky we were not in the kitchen when it happened. Even being careful with pressure cookers, they can still explode!
Friday, July 3, 2020
Japanese Curry Chicken with Rice, Potatoes and Edamame
This is perhaps one of my absolute favorite dishes to make because it tastes great and is SO EASY to make! Japanese Curry with rice, potatoes and edamame (usually we put peas though).
This is the first time using MILD for the curry. I usually use Spicy or Extra Spicy, but my wife is getting more sensitive to spicy foods, so we decided to try out the mild. Still very good! If you have a spice sensitivity but would like to try this type of Japanese curry, try the mild.
I like this brand of curry... S&B Golden Curry. Very flavorful and easy to use. It comes in two packages that break into four cubes each. Here's how you use it to make this dish.
Cut up chicken leg quarters and/or chicken breasts. Put the chicken in a big pot and fill perhaps 1/4 of the pot with water. Add a bit of salt and just put the pot on the stove and cook the chicken for perhaps 45 minutes in the pot. I add cut up potatoes just about 15 minutes before the chicken is done. Do not add the edamame (or peas) until later. Stir every now and then to rotate the chicken pieces in the pot.
After 45 minutes, I take the pot outside to finish the cook. My wife feels that it doesn't smell up the entire house of curry if you add the curry outside! I use a portable butane burner that you can get at most Asian stores for less than $20 and put the pot on that. I add in the two packages of curry pieces and bring it back to a boil. The sauce will thicken up when the curry cubes have melted. I stir constantly. At this time, I add in either edamame or frozen peas. After another 5-10 minutes, the dish is done! Serve over white rice and be sure to spoon in plenty of the sauce!
Give it a try! I think you will like it. Be sure to buy the S&B Golden Curry brand. Typically at Asian markets, the curry package of two is about $3.95. You can get it on Amazon as well, but they sell it for a LOT more money there. Try finding it at a local Asian market near you.
By the way, the chicken leg quarters were on sale for $2.90 for 10 lbs at my local grocery store, so the curry package cost more than the 10 lbs of chicken! Add in the cost of 1/2 package of frozen edamame and some rice, the total for 10 lbs of chicken that will last for days was under $9.00. Can't beat that!
Sunday, June 28, 2020
Chicken Jook Made In An Instant Pot And A Traditional Pressure Cooker
After making a whole frozen chicken a few days ago using my Anova Sous Vide Precision Cooker, I decided I wanted to see how different it would be compared to a frozen whole chicken made in an Instant Pot.
My wife said it would be good to use that chicken after my test to make Chicken Jook (Rice Congee) since we have not had Jook in so long. Great idea!
The Instant Pot chicken was set for 1 hour, 15 minutes (so much faster than Sous Vide at 9 hours!) and that is after the pot comes to full pressure, so you need to add the time it takes to reach full pressure and then add the time it takes to do a natural release. I decided after 15 minutes to release pressure manually... I didn't want to wait any longer.
Overall, the chicken in the Instant Pot was "fall off the bone" as expected. But, the Sous Vide chicken breast was FAR SUPERIOR! Sous Vide had very moist chicken breast even after spending a full night in the refrigerator. But the Instant Pot chicken was a lot drier, even though it was fall off the bone tender.
In comparison, if you use the Instant Pot, you gain speed and ease, but if you Sous Vide a whole frozen chicken, it's texture and moistness is far better. You use up more electricity with Sous Vide cooking as it takes 9 hours to finish the cook, but you gain a better chicken.
While the Instant Pot was doing its thing, I made Jook in a conventional pressure cooker. I added about 1-3/4 cups of long grain white rice to water that was perhaps 70 percent filled in the pot. We have noticed that this traditional pressure cooker from Fagor (top rated by America's Test Kitchen) tends to spurt out the congee when it achieves pressure. Of course, you could fill the pot with less water, but then it's not enough to eat and have leftovers!
Once pressure is achieved, I turned down the flame of the stove dramatically and eventually turned it off. Once the pressure was naturally released as much as I could stand, I manually released the remaining pressure. The jook was still a bit watery and the rice was not fully disintegrated yet, but that made it the perfect time to add shredded chicken breast meat and also 6 Century Eggs. Century Eggs are also known as 1000 year old eggs or 100 year old eggs. Essentially they are preserved duck eggs that take on a dramatic change during the preservation process. It grosses out most people who see it but if you are Asian, you are used to them in jook. I personally love them in jook and can't have jook without them! We also seasoned the jook with chicken bouillon, some ginger and a bit of salt. That's all it needed.
Overall, the chicken jook was perfect. Nice and smooth from pressure cooking and the chicken and eggs were great for the purpose. I often add a bit of oyster sauce to my jook and a very small drop of sesame oil. It's not needed, but I like it that way. We'll do it again in the future!
Friday, June 26, 2020
Sous Vide - Frozen Whole Chicken in Sweet Baby Ray's BBQ Sauce
I decided to make a Sous Vide chicken using a frozen chicken to see how it would turn out.
Using an Anova AN500 Sous Vide Precision Cooker, I followed Anova's suggestion of 9 hours at 150 degrees, but took the chicken out after 8.5 hours since it was about a 3 lb chicken. About 3 hours into the cook, I added Sweet Baby Ray's Sauce and a bit of salt to the chicken (after the chicken was defrosted by the water temperature).
Overall, the chicken was very good. The breast was nice and moist and not pink. However, the chicken thigh when separated at the joint had a bit of blood still. I figured this is because it was not cooked at 165 degrees.
I Googled the proper internal temperature for chicken and these two statements were found about the topic:
"The FDA Food Code recommends cooking chicken to 165°F (74°C). ... If you can hold your chicken at 145°F (63°C) for 8.5 minutes, you can achieve the same bacterial reduction as at 165°F (74°C)."
"For quality purposes, a chicken breast is properly cooked at 145 to 150 F. This temperature ensures that all pinkness is gone, but the meat is firm but still tender. However, the USDA recommends that chicken and poultry be cooked to a minimum internal temperature of 165 F for at least 30 seconds."
Anova was probably trying to keep the breast moist so that's why they recommended 150 degrees. Going forward, I think I would move that to at least 160 degrees to make sure the chicken is cooked better. It may force a slightly less moist chicken breast, but I think I'd rather have that than to have a small amount of blood still on the chicken thigh joint.
Overall, I think the chicken tasted very good and was nice and moist. Since I did not do anything to the chicken to try to make it more visually appealing by putting in the broiler to roast up the skin, the chicken looks a bit anemic. That's actually ok with me as many Asian chickens look this way when cooked at restaurants! The BBQ sauce tasted good, but was runny due to the water content of the chicken. I did pour out any of the water from the bag before putting on the sauce, but apparently there was more moisture in the chicken than could be found after only 3 hours into the cook.
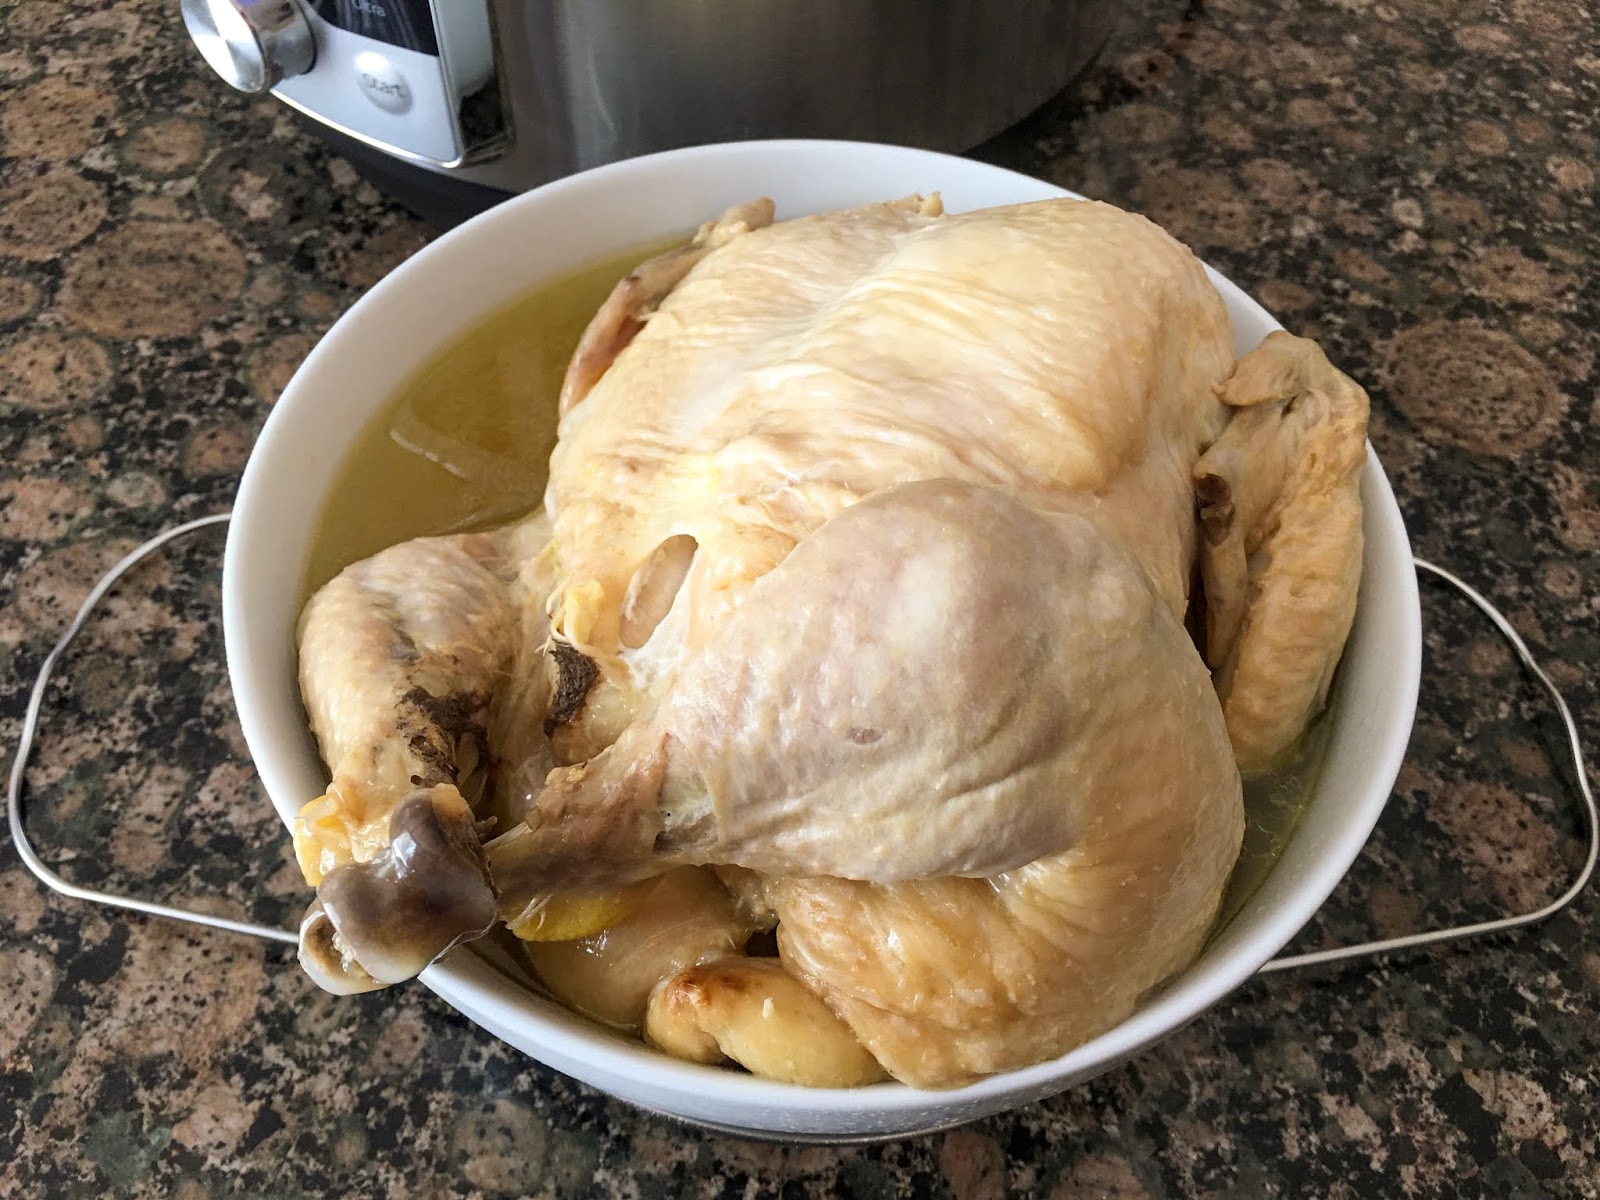
Still, the taste of the chicken was very good and it was easy to make. Take the chicken out of the freezer, rinse it off, and then put it in the bag and suspend it in the water bath. Set the sous vide heater to the desired temperature and set the timer to 9 hours. The formula for frozen chicken is use the same time for non-frozen and add an additional 1/2 total time to that. In this case, the proper time was 6 hours if not frozen, so 1/2 of that is 3 hours... total is 6 + 3 = 9 hours.
I served the chicken with white rice.